
I get asked about focus stacking a lot. In fact, I think the idea of focus stacking in landscape photography causes a lot of newer photographers – or ones without a whole lot of experience using Lightroom or Photoshop – significant amounts of stress. But, honestly, the process of stacking two images really isn’t that hard.
In fact, I think you can probably do the whole post-processing side of things in just a matter of minutes.
So, on today’s post, I’ve loaded up a video-guide below on how to focus stack. And, for those who prefer I’ve uploaded screenshots and words below.
What is Focus Stacking?
Without getting way too technical, photo stacking is the process of blending multiple images together to make one image that’s sharp from front to back.
Often times in landscape photography we have an element in the foreground – which we often call an anchor. Generally, we focus on that anchor so it’s nice and sharp.
However, if our anchor is too close to the camera we can’t achieve hyper-focal distance. Simply meaning that our background is going to be out of focus.
So, to remedy this, we take two (or more) photos and then blend them together using Photoshop – and in my case Lightroom as well – to give us one sharp image from front to back.
Focus Stacking in Camera
Ready for me to blow your mind?
There are actually a couple camera companies out there right now producing cameras that can do focus stacking in camera. I think that it might soon become standard in some cameras the way HDR photography did.
But, if you don’t have a camera that does focus stacking in camera, this is how you do it.
Steps to Do in The Field
The thing about focus stacking is that you can’t just decide you want to do it when you get home. You need to make the images this way in the field and then process them later.
Step 1 – Find a Photo
Not to sound “smart”, but to make an image using focus stacking you need to first find the right location.
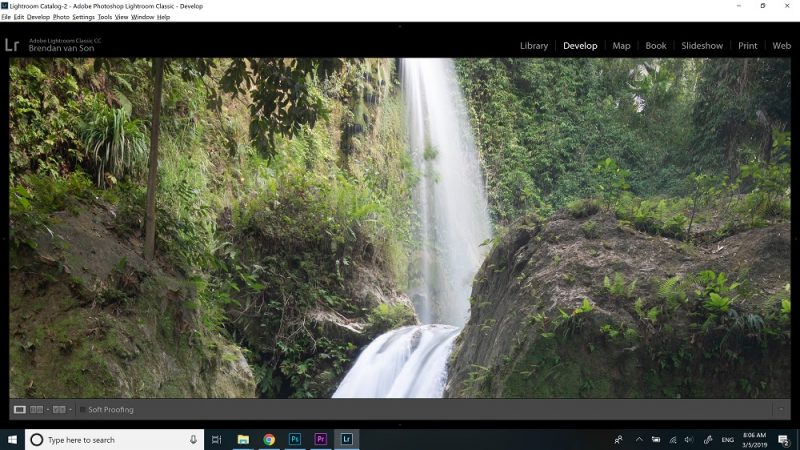
You don’t need to focus stack every image. You only need to do it if the scene requires it. And you don’t need to do math or be a rocket scientist to figure out when you should focus stack. Simply, take a photo with your preferred settings focusing on the foreground element. Then, check to see if the background is in focus. If it is, you don’t need to proceed. You’re good.
If the background is blurry, move to step 2.
Step 2 – Take a Second Photo
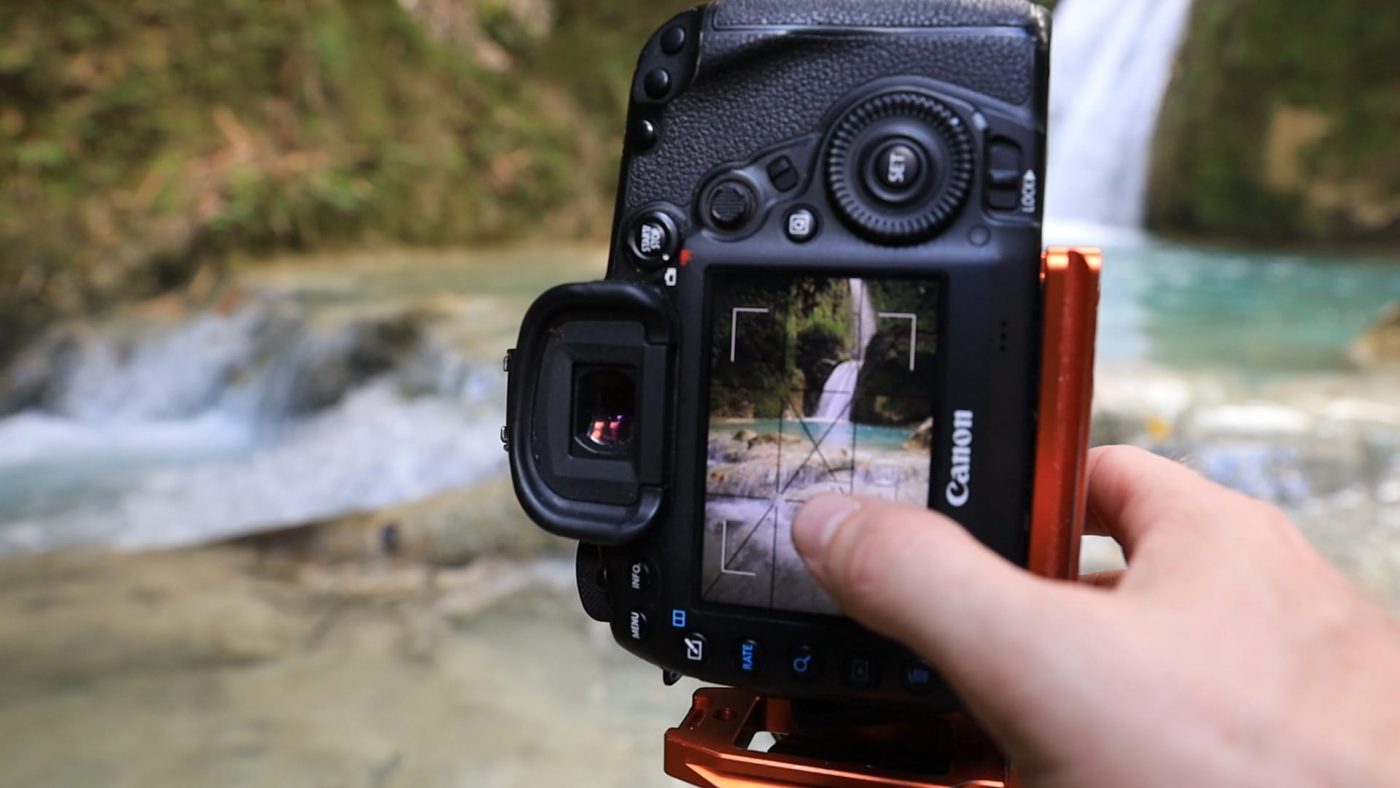
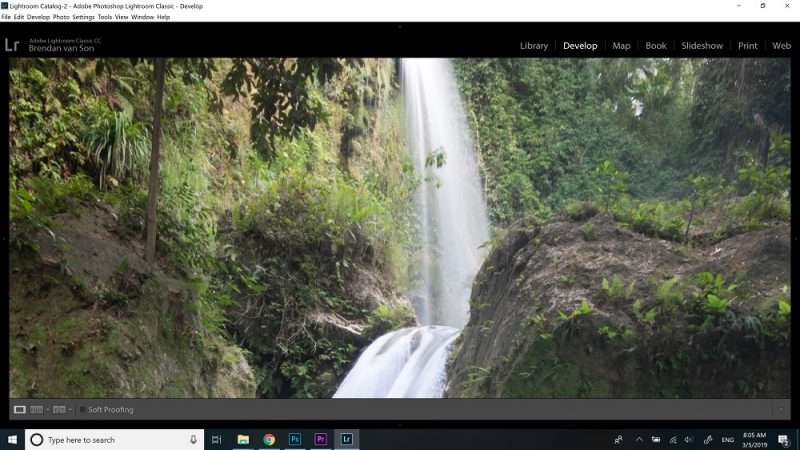
With the exact same settings as your first photo, now focus on the background element – in my case the waterfall – and take another picture.
As you can see by the 100% crops below, the foreground is now out of focus, but the background is in focus.
Focus Stacking Post Processing Workflow
I should note before getting into the post-processing workflow that you don’t even need Lightroom to focus stack. You can do it all in Photoshop. However, I like running my entire photo editing workflow through Lightroom to keep everything organized in my libraries.
So, for the sake of this tutorial, we’ll go through Lightroom.
Step 1 – Import into Lightroom
Personally, I import all my photos into Lightroom and just go from there. So, if you’re like me, you’ve already got all your images in Lightroom. So, find the two images you took for your focus stack and proceed to the next step.
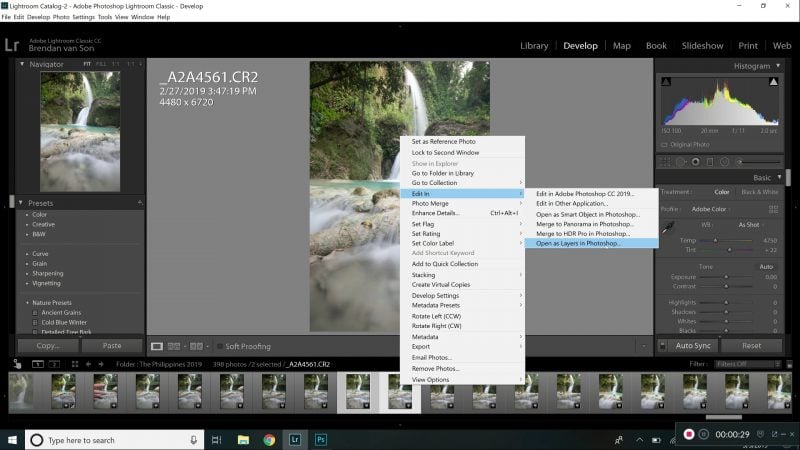
Step 2 – Open as Layers in Photoshop
In the bottom bar of Lightroom select both of the images.
Then, right click on them and scroll up to “edit in…”. Then, select the option of “open as layers in Photoshop…”.
The images will be brought over to Photoshop and set as layers – one on top of the other.
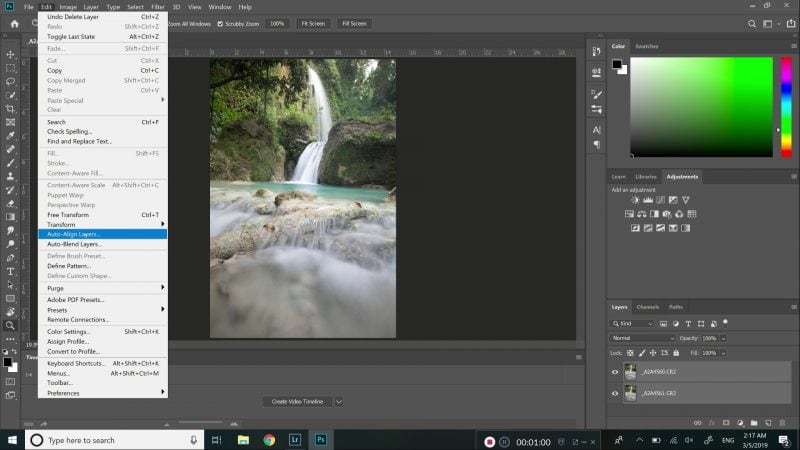
Step 3 – Auto-Align Layers
**DO NOTE SKIP THIS STEP**
When you change the focus point in an image, your camera actually zooms a little bit. It’s called focus breathing. So, if you don’t align the images, your final result will look out of focus.
To auto-align the layers, select both layers in Photoshop. Then, go up to “edit” and scroll down to “Auto-Align”. A new window will pop up, and simply choose “Auto” and hit OK.
Photoshop will align your two photos. And, warning, you’ll have a little bit of extra space around the edge due to the alignment. It’s normal, you can crop that out now or later.
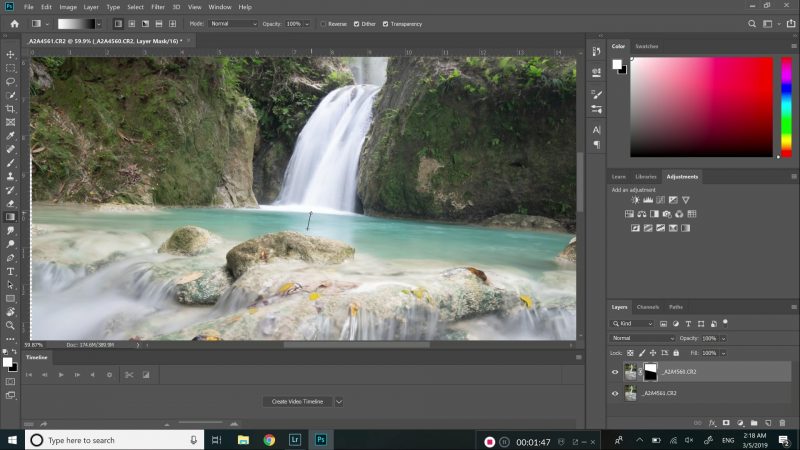
Step 4 – Add a Layer Mask to the Top Layer
Select the top layer in Photoshop and add a layer. It’s the little square with a circle in it below the layers.
Step 5 – Add a Gradient
With your layer selected, choose the gradient tool from the sidebar – or simply click g.
Then, make a gradient in the mid-ground of your photo. That will reveal the bottom layer meaning that you can now see both the top image (focused on the foreground) and the bottom image (focused on the background) giving you a sharp image from front to back.
**Note** In certain situations you might need to take a 3rd image for the mid-ground and blend three images. If that’s the case, add a layer mask and gradient revealing the middle ground from the foreground image. Then merge those layers. Finally, use another layer mask and gradient to take image to reveal the background. It seems complication, but it’s relatively quick and simple.
Step 6 – Save
Now that your image is done, hit save and it’ll be brought over to Lightroom as a new tiff file. You’ll still keep the two original photos, but have the blended image as well.
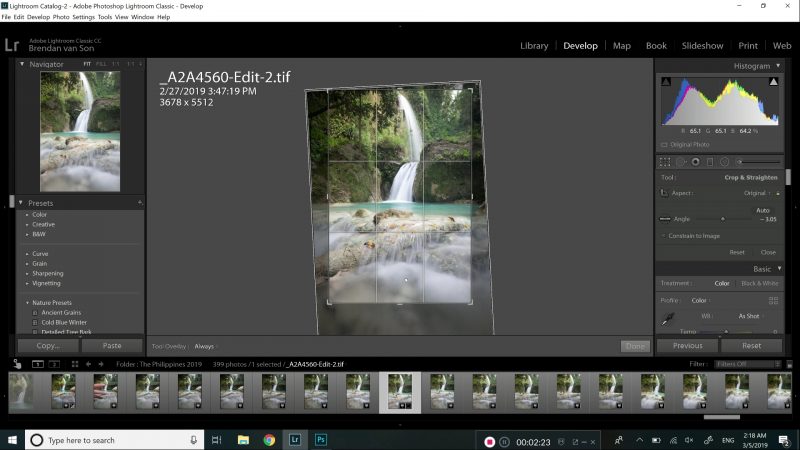
Step 7 – Edit in Lightroom
In this final step you can now edit your image to your heart’s content.
Final Focus Stacking Result
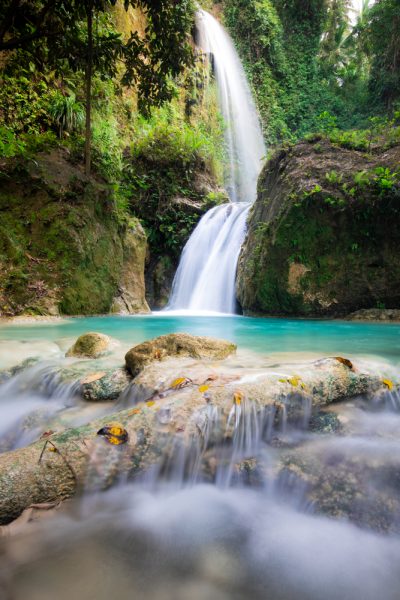
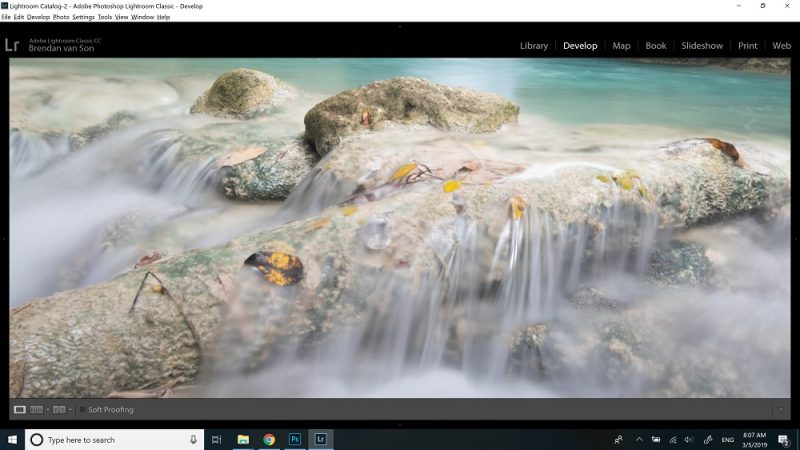
In the end, I’m pretty happy with the result of my focus stacking in Cebu – as you can see to the right. I’m honestly pretty lazy about my focus stacking and tend to simply deal with a slightly out of focus background. In general, I prefer to work with one single image not because I’m a purist, but because I’m a laziest.
That being said, I’m trying to get better at blending multiple images more often as I move towards printing more images. When you print your photos large, you an really see the parts of the image that are out of focus. Hence why this is so important.
I should also mention that most stock photography sites don’t see focus stacking as photo manipulation as it doesn’t change the reality of a scene. In fact, it almost makes it even more true to the human eye.
What if There’s More Than 2 Images to Stack?
I should mention that there’s more than one way to blend focus stacked images.
In fact, some people find it much easier to use the following technique. I use the next way to edit stacks with 3+ images. But, you can do this for 2 images.
It’s simple:
- Open photos as layers in Photoshop
- Select the layers
- Go to “edit” then, “Auto-Align layers”.
- Select all the layers again
- Go back to “edit” but choose “Auto-Blend Layers”
- On the prompt, select “Stack images”
- Photoshop will then process the focus stacking for you.
Learn Focus Stacking in The Field
I hope this has made focus stacking seem a little less scary for you.
And, as always a reminder that you can come on one of my travel photography workshops to learn out in the field. I have spots left for some cool destinations like Iceland and Nepal.
Or, if you’re interested in getting information on future workshops, be sure to sign up for info below.