

After spending considerable time in The Philippines, one of the things I’ve learned to love here is photographing the many waterfalls. Yet, somehow I’d yet to have visited Cebu or its many waterfalls. So, on this most recent trip a visit to Cebu to photograph the waterfalls was a priority for me.
It’s said that there are over 1000 waterfalls in Cebu. Obviously would couldn’t visit that many waterfalls in just 3 days. But, we did our best to visit some of the more popular ones in the south of the island where we based.
These are the waterfalls of Cebu and how I photographed them.
Binalayan Waterfall
Our plan, actually, to visit 2 falls a day. However as we spent more time at each fall we realized that it’d be impossible. There are tourists at each waterfall – obviously – and that meant we needed a bit more patience to photograph them. So instead, we decided to visit just 1 fall a day. The first was Binalayan Falls.
Entrance Fee and Times
Entrance fee to Binalayan falls was 50 pesos. But, you’re required to take a local guide with you. The local guides are “volunteers” who expect to be tipped. I read online that the average tip is about 50-100 pesos. However, we ended up tipping our guide 500 because he spent a couple hours with us guarding our camera gear and just being great.
The falls are open from 9am to 5pm which makes being a photographer a little bit of a struggle. However, the light at 3-5pm was definitely soft enough for photos as the heavy tree cover softens it a bit.
The Hike
The hike to the falls is only about 15 minutes. But you do cross the river about 5 times before you get to the falls. I think it’s pretty difficult to keep your feet dry. So you might want to hike in flip flops or water shoes.
The hike is quite flat with the exception of the last little bit up to the top waterfall which goes up a series of steps. But, even that part is far from strenuous.
The Falls and The Photos
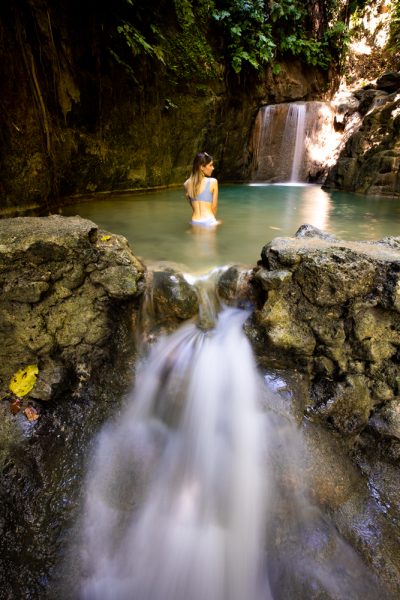
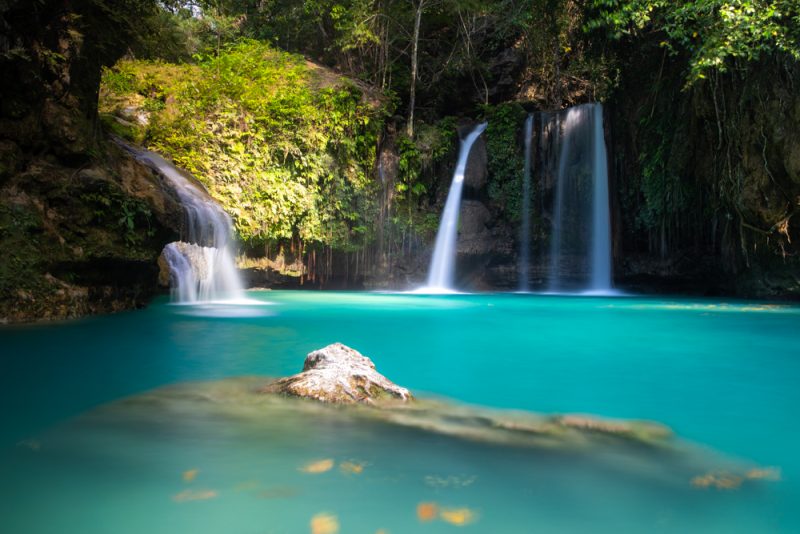
There are 2 falls here at Binalayan. The bottom fall might actually be the most photogenic. The water below is that brilliant blue colour famous in Cebu and the water falls calm enough that you can really get a couple cool photos.
Since I was struggling for scale, I got Jodie to Pose in the water to give the image a very “tropical” feel.
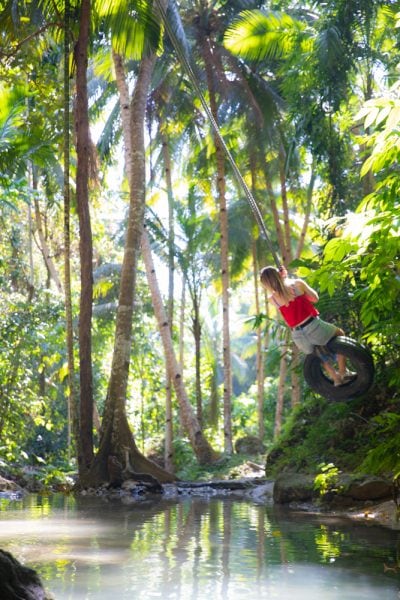
Behind that lower fall there’s also a tire swing that could probably make a pretty good photo if the light was either softer or more heavily back-lit. Still, we attempted a photo with Jodie on the tire swing, and I think it worked despite the bad light.
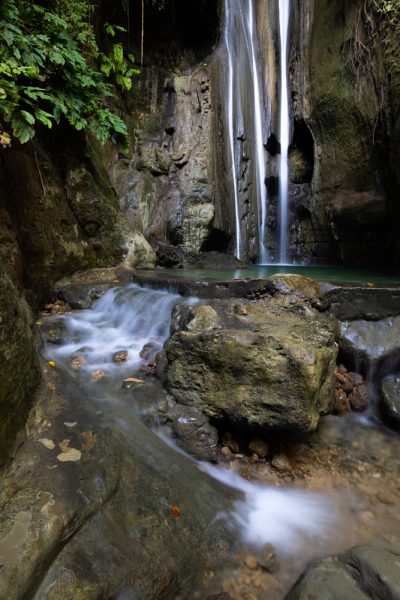
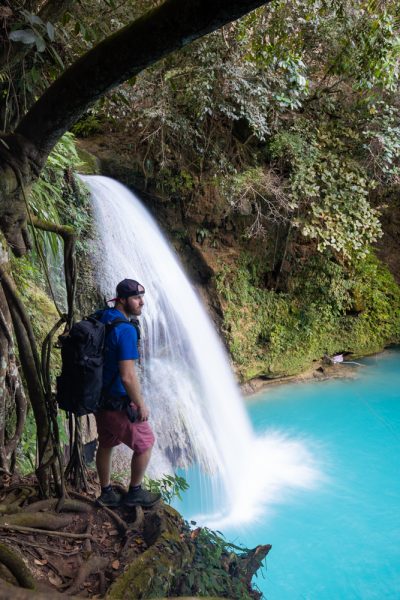
And finally, there’s the top falls. These falls fall (mind the pun) in the category of beautiful but hard to photograph. There really isn’t enough water tumbling down the tall falls for the photos to show the drama here. I tried using a bit of foreground to make the photo work, but I think it came out a bit flat.
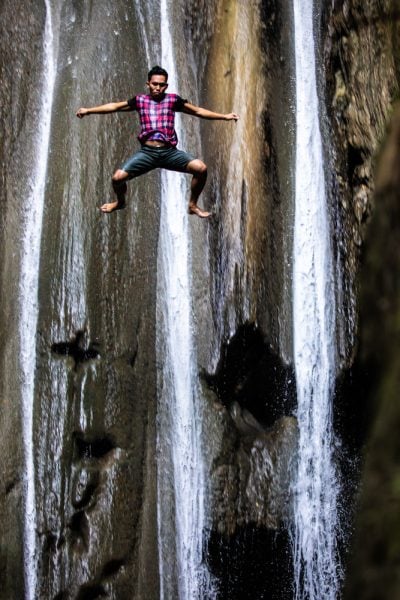
But still, it’s a fun place to photograph – especially if people are cliff jumping off the 10 meter high jump.
Kawasan Falls
These are likely the most popular waterfalls in Cebu. So don’t expect to have them all to yourself. Tourists and locals alike come here to take part in some canyoneering and cliff jumping, or simply to gawk at the Gatorade blue waters.
Entrance Fees and Times
The entry fee to get into Kawasan Falls is 50 pesos, but you don’t require a guide to explore. There are a bunch of companies that offer canyoneering trips that obviously cost a bit more.
According to the people at the entrance ticket booth, there are no opening or closing times. So I’m assuming if you showed up for sunrise there’d be no one there to stop you from going in. There’s a guest house at the falls as well.
The Hike
It was about 2km from the parking area at the church to Kawasan Falls. But the hike is extremely flat. In fact, it hardly feels like you’re going up hill at all. Moreover, most of the path is totally paved and lit. Once you get to the main falls, though, there are some steeper sections of trail that lead to the waterfalls above.
The Photos and How I Made Them
There are actually a number of photos to be made at Kawasan Falls. In fact, I think of all the waterfalls in Cebu that we visited this is likely the one with the most variety for photographers.
In total, I made 5 photos.
The Top Falls
These falls at the top were full of canyoneer participants jumping off the cliffs. It was entertaining to watch. And in the moments between groups I grabbed photos.
In the end, the photo below is my favourite example. And while it looks like a simple photograph it wasn’t simple to make. I used a 2-stop medium grad ND to keep the light on the left from blowing out. I used a 3-stop ND filter to slow the shutter down to 8 seconds. And, I used a polarizer to cut out the reflection on the water and really give the waterfalls scene a dreamy tropical feel.
Kawasan from Above
After making the photos from above, we hiked down to a scene I noticed on the way up. There was a somewhat open area above the falls I thought I could get an image for a client from.
Here, I made a simple photo. There’s no filter. It’s more of a “mood” photo. Kind of a classic Instagram feel to it.
Classic Kawasan
I actually skipped right past the classic image of Kawasan Falls. Instead, I wanted to integrate the river running below it. And, to give scale I got Jodie to pose.
The image was taken with no filter and my 100-400mm lens. But I wasn’t exactly happy with the composition. I had to work around the umbrellas and tourists with my composition so it wasn’t great in the end.
Getting Creative
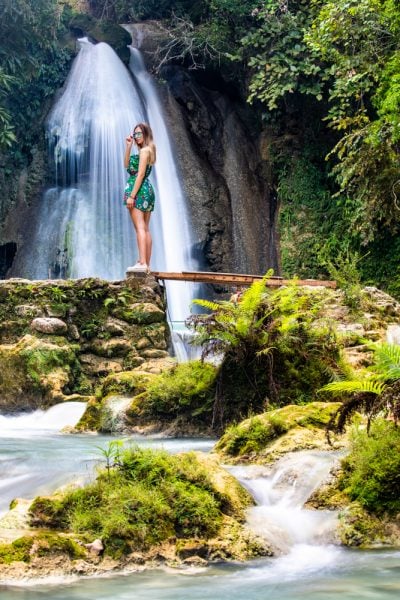
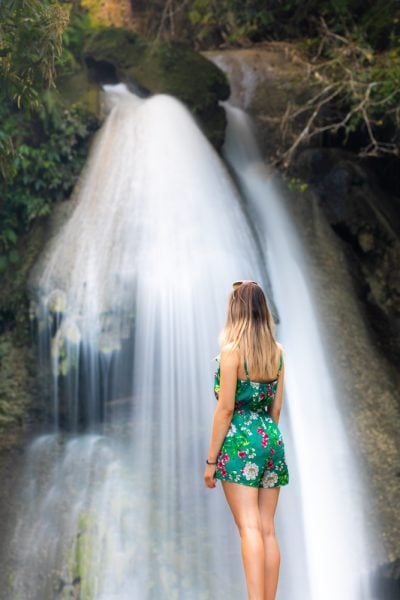
Since the image above didn’t really work for me, I tried something different. I got much more telephoto on my composition and took a much more “portrait” style image of Jodie in front of the falls.
But, the slight long exposure to this image made it tricky. At 200mm+ of focal distance you really can’t have any lens movement and the model can’t move. So, even at an exposure of under a second Jodie had to be totally still. In the end, I think this really did work.
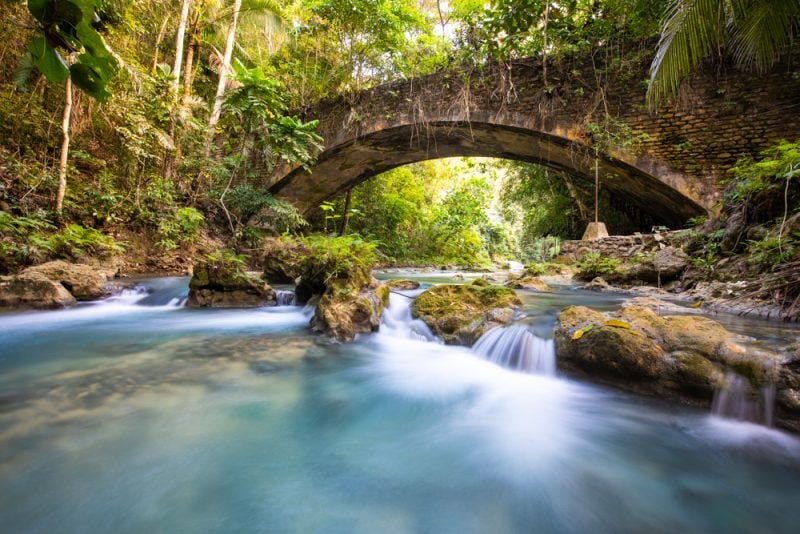
The Old Bridge
Amazingly, the best photo location at Kawasan Falls – in my opinion – isn’t of the falls themselves. Instead, it’s of the river flowing under and old bridge.
On our way out of the falls, right at sunset we stopped at the bridge and I stepped knee deep into the river to grab the photo below. It was taken on the 16-35mm f/4 and I love how it came out.
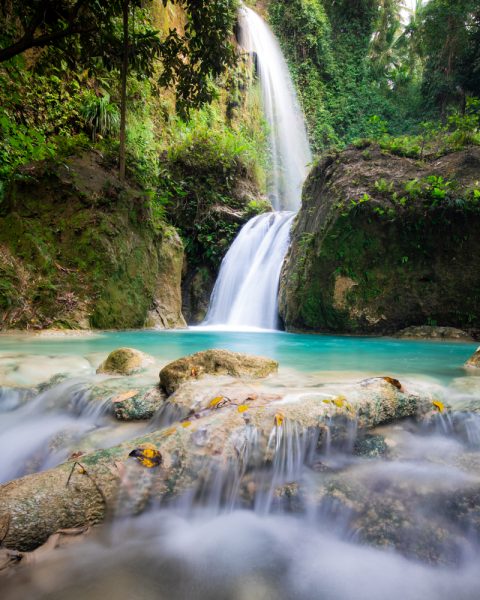
Inambakan Waterfalls
While Kawasan Falls is incredibly busy, Inambakan is maybe Cebu’s best hidden gem. In fact, when we arrived we were the only ones. And the guest book indicated that there hadn’t been other tourists there for over an hour.
Entrance Fees and Times
This another one of those falls with entrance times. At the booth they told me the times are 9am-5pm. Although I think that if you were to show up late they’d let you stay until sunset.
There was no need for a guide, but there were some people standing around keeping an eye on us. And there were life jackets for rent if you wanted one.
The fee for entry was 50 pesos or 75 if you wanted to go swimming.
The Hike
Unlike most waterfalls, the hike to Inambakan Falls is actually downhill. And it’s not far. From the car park to the falls it shouldn’t take more than 5-10 minutes to walk.
**Note that the stairs are pretty steep so it is a bit of work to get back up. They certainly aren’t wheelchair accessible.
Like most of the waterfalls in Cebu there’s actually more than one waterfall here. You have the main falls and then a couple smaller ones below.
The Photo and How I Made It
I actually only ended up taking one photo – the one you see to the right.
And you actually saw how I photographed this in my last post about focus stacking. So, if you’re interested in how this photo is made be sure to head over to that post and have a look.
More Cebu Waterfalls?
With over 1000 waterfalls in Cebu, I’m assuming there are some really beautiful falls this post missed. If you have your favourite, please feel free to drop a comment below.
Philippines Photo Tour?
A couple weeks ago I thought out loud about the possibility of another travel photography workshop in The Philippines.
I said in that post that another Philippines trip would likely are’s a lot of interest. So, if you’re potentially interested in joining a Philippines photo tour in the future – or any of my photo trips – be sure to sign up to the form below for upcoming trip information.